Setup Guide
BeagleBone Black Initial Configuration
What You Will Need
-
SD Card with CoPilot Installed We recommend a 8-16GB class 4 SD card. You can follow the Copilot installation guide to load Copilot on to your SD card.
-
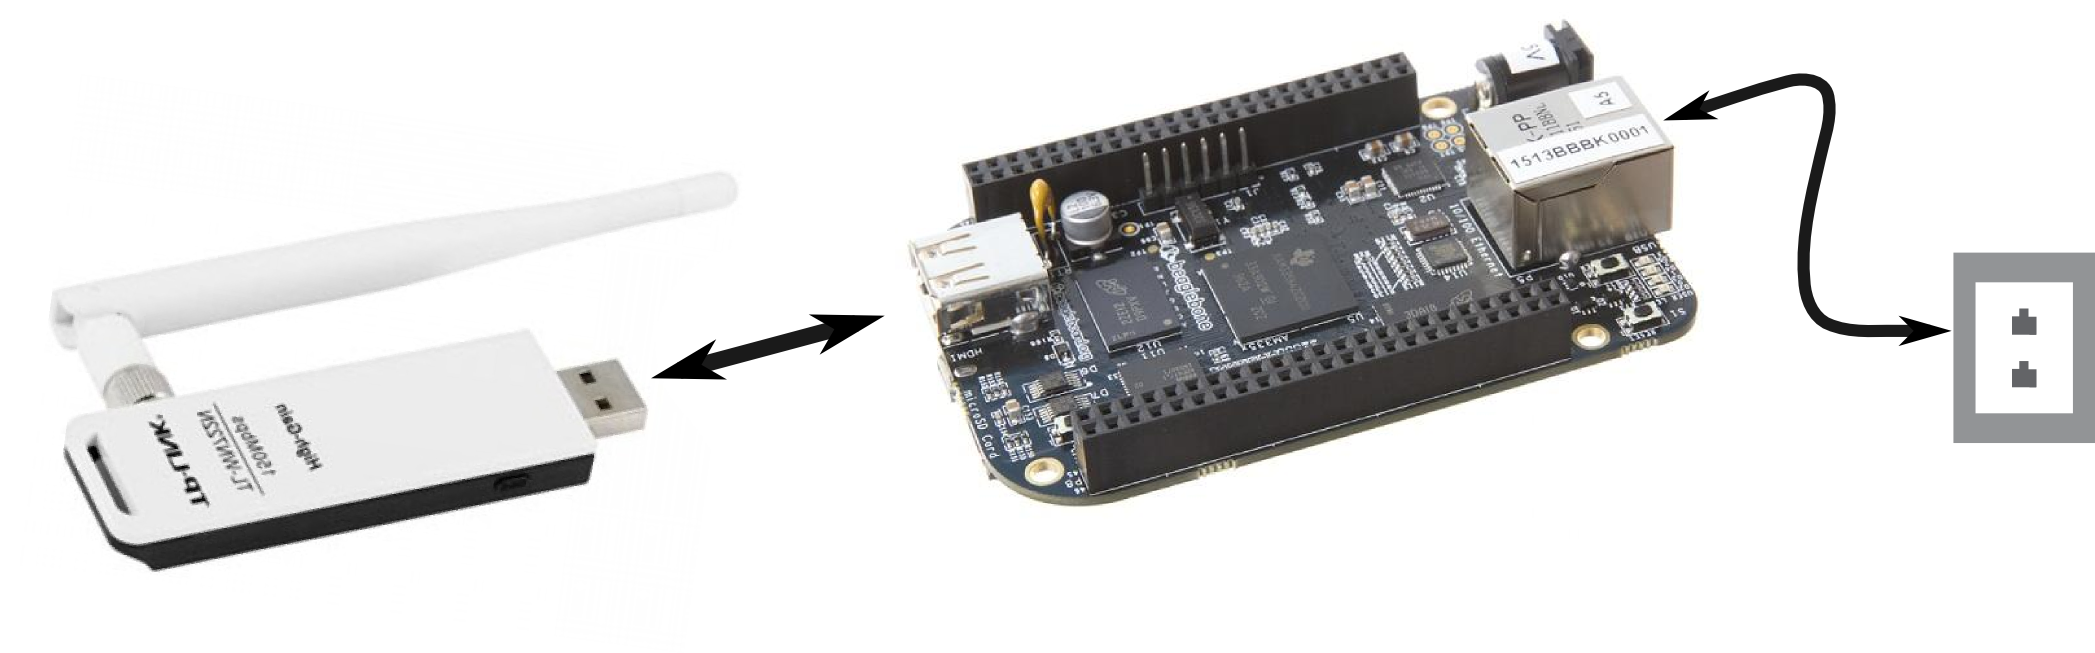
Wireless Antenna We recommend a TP-LINK TL-WN722N External Wireless Adapter
-
BeagleBone Black w/ Power Supply These instructions are for the BeagleBone Black version of CoPilot.
-
A wireless enabled personal computer, phone, or tablet
Step 1: Attach Wireless Antenna and Plug-in Ethernet
Step 2: Plug in power supply
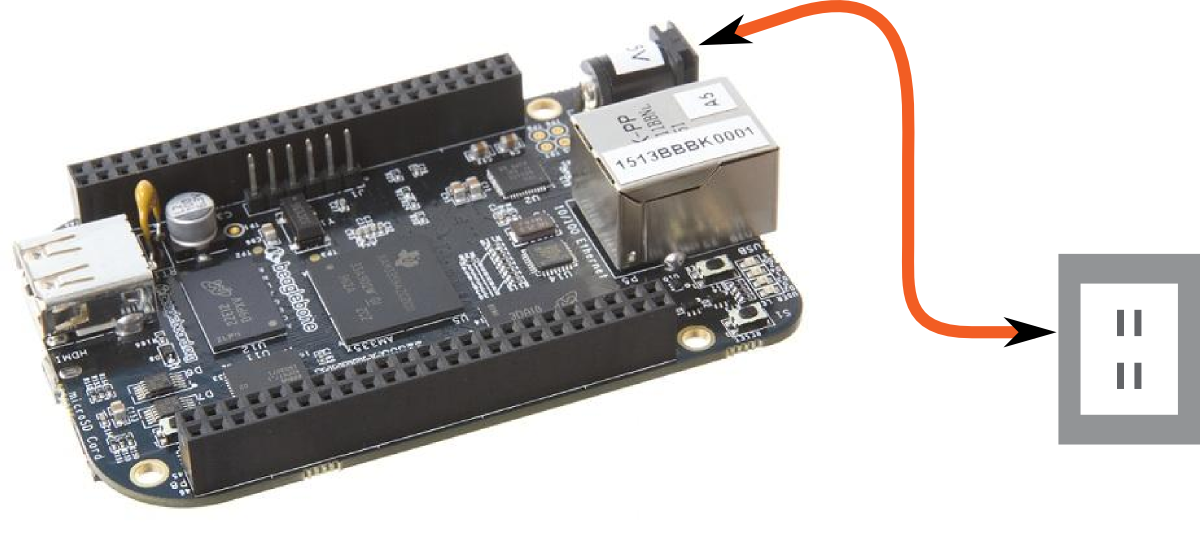
- Wait 60 seconds for CoPilot to power up.
Step 3: Connect personal device to the ‘copilot’ access point
- Connect to the copilot access point.
- Type in the password copilot_pass.
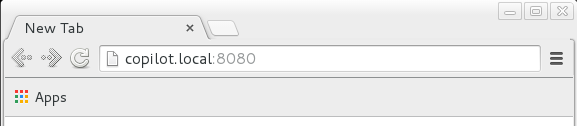
Step 4: Open a web browser and type in “copilot.local:8080”
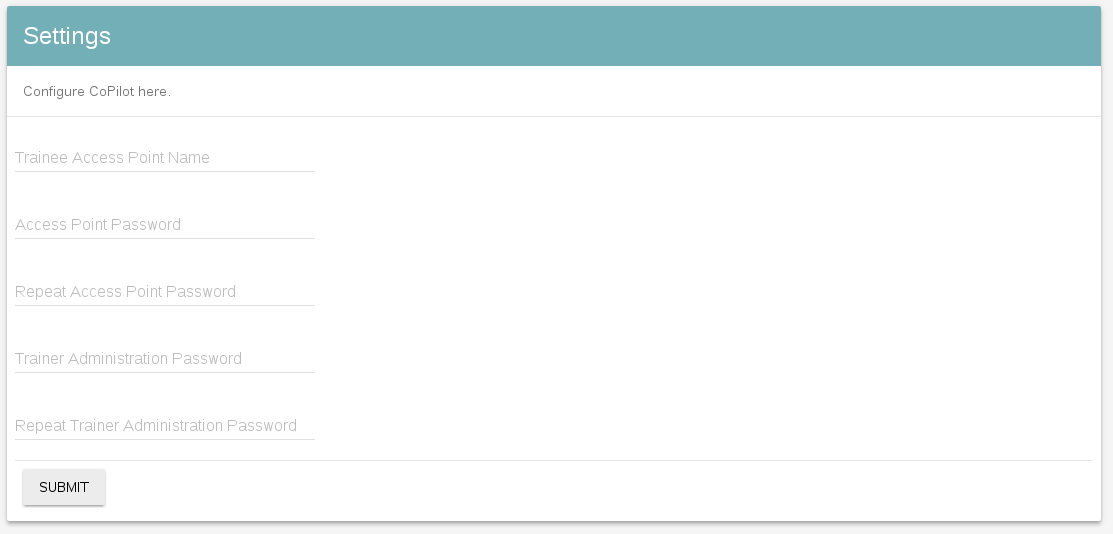
Step 5: Fill out the initial settings
-
Access Point Name This is the name you would like the CoPilot access point to advertise. This will be the wireless network name that you and students use to access CoPilot. You cannot use white-space characters (spaces or tabs) in your access point name.
-
Access Point Password This is the password that will have to be typed in to connect to the CoPilot access point. Once you have filled out this field, repeat the password in the “Confirm Password” text box below it.
-
CoPilot Password Type in a password that will allow you to access the CoPilot interface. This password will be required to create and configure CoPilot to create censorship environments. Once you have filled out this field, repeat the password in the “Confirm Password” text box below it.
NOTE: The setting on this page take place immediately. Once you have submitted this page you will have to reconnect to the wireless access point using the Access Point Name and Access Point Password you entered here to continue using CoPilot.
BeagleBone Black Advanced Configuration
Create a new profile
- Open the menu in the top left corner and choose the New item.
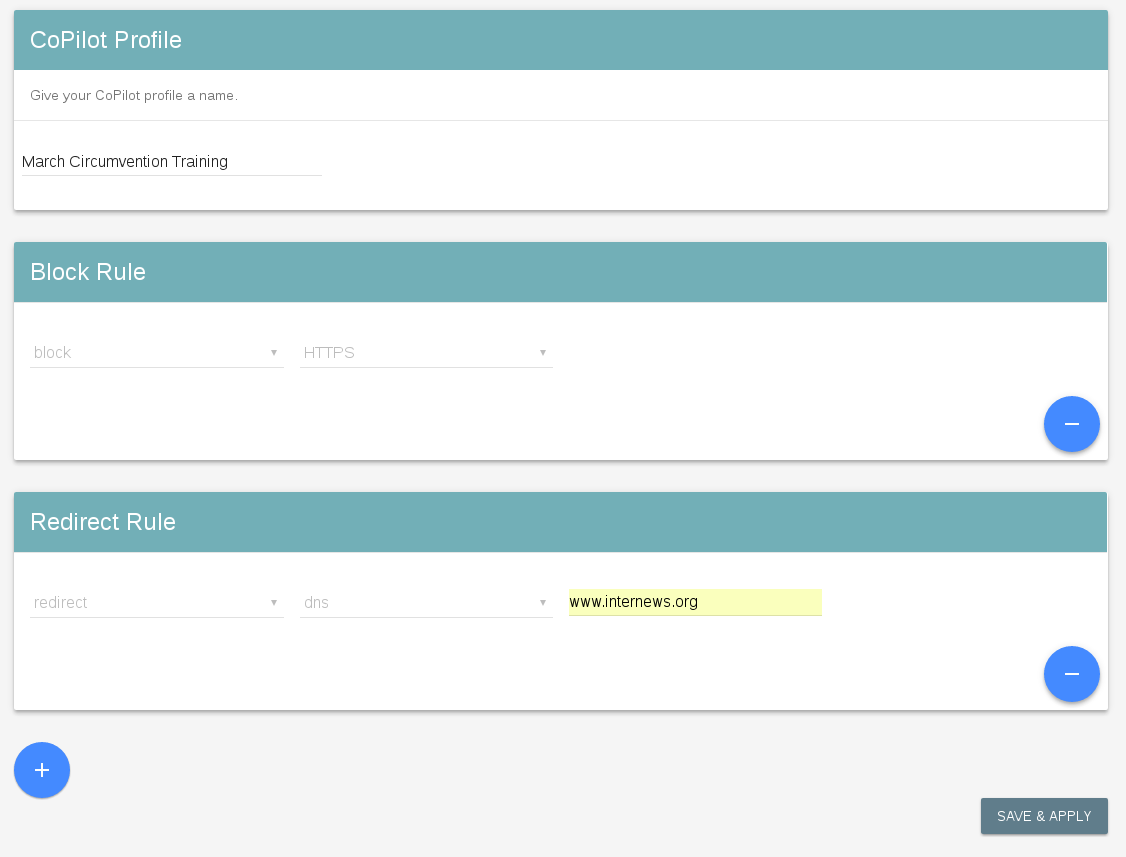
- Give your profile a name in the Name text box. CoPilot uses this name when saving, loading, and sharing profiles.
- Using the Action drop-down menu choose how you would like to censor the traffic that you target.
- Using the Target drop-down menu choose a type of traffic to have the action affect.
-
If the action uses a Sub-Target a text field will appear. In the Sub-Target text-field you will can type in a website address or IP address you would like CoPilot to take Action on.
- Click the Save & Apply Button.
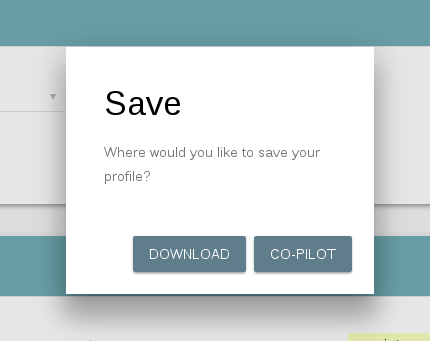
- In the Save Dialogue that appears click the CoPilot button.
Add a rule to your current profile
- Open the menu in the top left corner and choose the Edit item.
- Click on the blue plus symbol below that sits below the last rule.
- A new empty rule will appear.
- Edit the new rule using the instructions under creating a new profile
- Click the Save & Apply Button.
- In the Save Dialogue that appears click the CoPilot button.
Remove a rule from your current profile
- Open the menu in the top left corner and choose the Edit item.
- Click on the orange minus symbol next to the rule you would like to remove.
- The rule will disappear from the page immediately.
- Click the Save & Apply Button.
- In the Save Dialogue that appears click the CoPilot button.
Load a profile
- Open the menu in the top left corner and choose the Load item.

- Click on the name of the profile you would like to load. (In the example above you could load the profile named yahoo)
- You will be redirected to the Profile Page to edit or apply the loaded profile.
Download your current profile
- Open the menu in the top left corner and choose the Edit item.
- Click the Save & Apply Button.
- In the Save Dialogue that appears click the Download button.
Upload a profile
- Open the menu in the top left corner and choose the Load item.
- Click the Browse… button.
- Select the profile you would like to upload using the file browser dialogue that appears.
- The name of your profile will now be displayed. (In the example image below my profile is named my_profile.config)
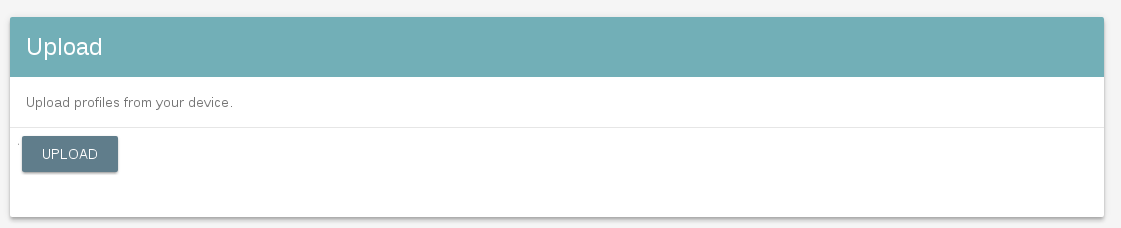
- Click the Upload button.
- You will be redirected to the Profile Page to edit or apply the uploaded profile.
Change the wireless password students will use to access CoPilot
NOTE: This activity will require you to reconnect to the access point when you have finished.
- Open the menu in the top left corner and choose the Settings item.
- In the Access Point Password text box type in the new password
- Re-type the password in the Repeat Access Point Password text box that follows.
- click the Submit button at the bottom of the page.
- Type your current “CoPilot Password” in the text box that appears and click the submit button.
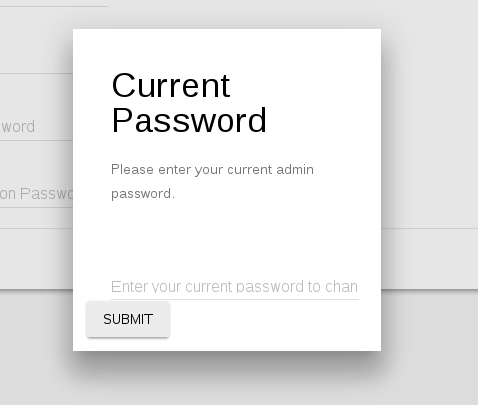
- Congratulations! You have changed the access point password.
REMINDER: You will now need to disconnect from the access point and re-connect with the new password.
Check the current status of your CoPilot Device
- Open the menu in the top left corner and choose the Info item.
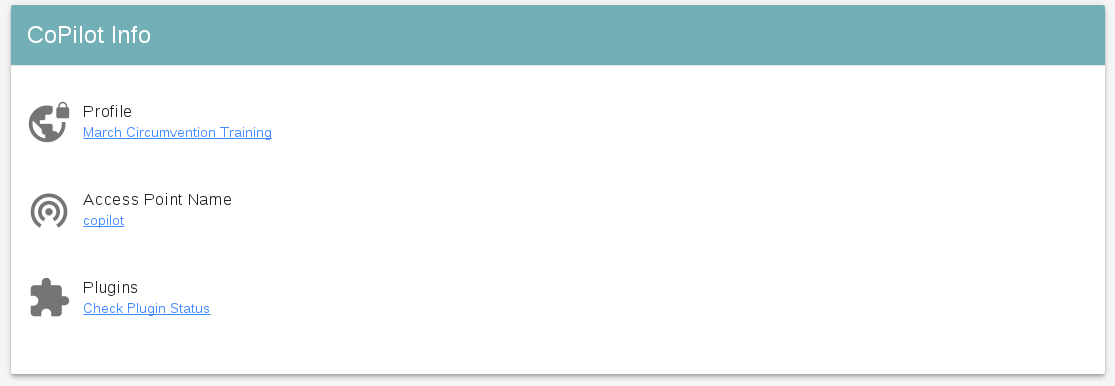
- The profile that is currently in use will be labeled Profile:. In the image above the profile being used is named yahoo.
- The current access-point name that CoPilot is advertising will be labeled Access Point Name:. In the image above the profile being used is named my_copilot.